The temperature is finally falling, afternoon rainstorms are becoming more common, and we’re officially back to school and work. And friends… I am kicking myself.
I don’t know if I was hyper-focused on a million other things or if I was simply in serious denial about returning to a busy schedule, but I completely failed to prep my kitchen apothecary for cold and flu season.
And wouldn’t you know it? We have already been hit by a vicious cold.
Of course, the minute we needed them, I realized we were missing all those lovely herbal preparations that could have made everyone a little more comfortable. So here I am, scrambling to restock my shelves and jars—and taking you along with me.
Before I go too far, though, I need to tell you something.
I have actually been hesitant to share much about herbalism here just yet. I’ve been researching, reading, and experimenting for about two years now. I’ve spent a lot of time learning about herbs and trying different preparations to see what works well for me and my family.
That being said, I am far from an expert.
So… here is the first disclaimer for this post.
Disclaimer: I am not a medical professional. The remedies I use are things that I have chosen to use with my own family, and I am sharing them as personal experiences and for educational purposes—not as medical advice. Always talk with a qualified healthcare professional before trying herbal remedies, especially if you are pregnant or breastfeeding, have a medical condition, are giving herbs to a child, or take prescription or over-the-counter medications. “Natural” does not automatically mean safe. Herbs can have contraindications, side effects, and drug interactions that you need to be aware of.
And you might be surprised by how many healthcare practitioners are open to discussing herbs and alternative approaches. Herbal research is also an increasingly interesting area of study, so I always encourage you to have an honest conversation with your healthcare provider rather than trying to navigate it all on your own.
Disclaimer number two: This post may contain affiliate links. That means if you purchase something through one of my links, I may make a small commission at no additional cost to you. Thank you so much for supporting my content and allowing me to keep sharing what I’m learning.
Whew. That was a mouthful.
Okay. Now let’s dive in!
Fire Cider
The first preparation I should have had on hand by now is my wonderful fire cider.
I actually have a whole previous post dedicated to fire cider, which I’ll link here because I go into much more detail about what it is, how I make it, and why I love keeping a jar around.
Fire cider is one of those preparations that makes me feel like I am prepared to fight off anything that comes our way. It’s spicy, tangy, warming, and packed with flavorful ingredients like apple cider vinegar, garlic, onion, ginger, horseradish, and hot peppers.
It is definitely not for the faint of heart!
I like to think of fire cider as one of my “just in case” preparations. I keep it around during the colder months and reach for it when everyone around me seems to be coughing, sneezing, and just run down.
One important note: If you mix a splash (yes, a splash, don’t attempt to take much more than a tablespoon at once) with warm honey, it’s actually very enjoyable.
Simple Fire Cider Recipe
Ingredients:
½ cup fresh ginger, chopped
½ cup fresh horseradish, grated or chopped
½ cup onion, chopped
½ cup garlic cloves, roughly chopped
1–2 fresh hot peppers, sliced
1 cinnamon stick
1 teaspoon whole black peppercorns
Apple cider vinegar, enough to completely cover the ingredients
A sliced orange or Pomegranite seeds
Honey, to taste
Directions:
Add everything except the honey to a clean glass jar. Pour in enough apple cider vinegar (with the mother) to completely cover the ingredients, leaving a little room at the top.
Cover with a non-reactive lid. If you're using a metal lid, place parchment paper between the lid and vinegar.
Give it a good shake and store it in a cool, dark place for about 2–4 weeks, shaking the jar every day or two.
Strain through cheesecloth or a fine mesh strainer, squeezing out as much liquid as you can. Add honey to taste.
Store in the refrigerator.
And there you have it—your very own spicy little bottle of winter sunshine.
Elderberry Syrup
Next up is elderberry syrup, which is probably one of the most recognizable herbal preparations for cold and flu season.
Elderberries have been used traditionally in herbal medicine for a very long time, and they are incredibly easy to turn into a syrup.
My favorite thing about elderberry syrup is that it feels like medicine without tasting like medicine. Add some honey, cinnamon, ginger, and a few other herbs and spices, and you have something that feels much more like a delicious winter tonic than something you have to force down.
Simple Elderberry Syrup
Ingredients:
1 cup dried elderberries
4 cups water
1 cinnamon stick
1 teaspoon dried ginger, or several slices of fresh ginger
½ teaspoon whole cloves
½ cup honey, or to taste
Directions:
Add the elderberries, water, cinnamon, ginger, and cloves to a saucepan.
Bring to a boil, then reduce the heat and gently simmer for about 30–40 minutes.
Remove from the heat and allow it to cool slightly. Strain the liquid well, pressing the berries to get as much liquid out as possible.
Once the liquid is warm rather than hot, stir in the honey.
Pour into a clean jar and refrigerate.
Important: Do not eat raw elderberries or use raw/undercooked elderberry preparations. Elderberries should be properly cooked before consumption. Honey should never be given to children under one year of age.
Elderberry Tea
If you don’t want to make a whole batch of syrup, elderberry tea is another lovely option.
This is especially nice when you’re already feeling under the weather and want something warm and comforting. I love combining elderberries with ginger, cinnamon, and a little lemon.
Simple Elderberry Tea
Ingredients:
1 tablespoon dried elderberries
1–2 slices fresh ginger
1 small cinnamon stick
2 cups water
Honey and lemon, to taste
Directions:
Combine the elderberries, ginger, cinnamon, and water in a small saucepan.
Bring to a gentle boil, then reduce the heat and simmer for about 15 minutes.
Strain thoroughly into a mug and allow it to cool slightly. Add honey and lemon to taste.
Again, make sure the elderberries are properly cooked rather than simply steeping raw berries in hot water.
There is something about holding a steaming mug of herbal tea when you’re sick that just makes everything feel a little more manageable.
Sometimes the remedy is partly about the herbs and partly about slowing down long enough to actually take care of yourself.
And goodness knows we could all use more of that.
My “Flu Bomb” Tea
Now we’re getting into the fun stuff.
I have affectionately named one of my favorite cold-weather tea blends Flu Bomb Tea.
The name is dramatic. The tea itself is actually quite lovely.
This is the tea I make when I’m feeling like I’ve been hit by a truck and want something hot, spicy, lemony, and comforting.
And just to be clear, despite the name, this tea does not cure or prevent influenza. It’s simply my nickname for a strong, warming herbal tea that I enjoy when I’m feeling under the weather.
My Simple Flu Bomb Tea
Ingredients:
1 inch fresh ginger, thinly sliced
½ teaspoon dried thyme
½ teaspoon dried peppermint
¼ teaspoon cinnamon
Juice of ½ lemon
1 tablespoon honey
2 cups water
A tiny pinch of cayenne, optional
Directions:
Add the ginger, thyme, peppermint, cinnamon, and water to a small saucepan.
Bring to a gentle simmer and let steep for about 10 minutes.
Strain into a mug and add the lemon juice, honey, and, if you're feeling brave, a tiny pinch of cayenne.
Sip slowly while wrapped in your favorite blanket.
Because sometimes a dramatic cup of tea is exactly what the situation calls for.
Sore Throat Tea
There are few things I dislike more than a scratchy, angry sore throat.
For this one, I like keeping a simple sore throat tea blend on hand. Marshmallow root and honey are two of my favorite additions when I want something soothing.
Simple Sore Throat Tea
Ingredients:
1 tablespoon dried marshmallow root
1 teaspoon dried chamomile
2 cups water
1 tablespoon honey
A squeeze of lemon, optional
Directions:
Combine the marshmallow root and water in a saucepan and gently simmer for about 10–15 minutes.
Remove from the heat and add the chamomile. Cover and let steep for another 5–10 minutes.
Strain and allow to cool slightly before adding honey and lemon.
One little herbalism note: marshmallow root can potentially affect the absorption of some medications, so if you take prescription medications, check with your pharmacist or healthcare provider about whether you should separate them from this tea.
Homemade Cough Syrup
And then there is the cough.
That awful, annoying, keeps-you-awake-at-2-a.m. cough.
This is where having a homemade cough syrup ready to go can be really nice.
There are countless herbal cough syrup recipes out there, but I tend to favor simple preparations. Honey is the star here because it can be soothing for an irritated throat and cough.
Simple Honey & Thyme Cough Syrup
Ingredients:
½ cup honey
½ cup water
2 tablespoons dried thyme
1 tablespoon lemon juice
Directions:
Add the water and thyme to a small saucepan.
Bring to a gentle simmer and let it steep for about 10 minutes. Strain well.
Allow the thyme infusion to cool until it is warm rather than hot.
Stir in the honey and lemon juice.
Pour into a clean jar and refrigerate.
Important: Honey should never be given to children under one year old. And if a cough is severe, persistent, accompanied by difficulty breathing, chest pain, dehydration, confusion, or other concerning symptoms, this is not a homemade-remedy situation. Please seek medical care.
Ginger & Lemon Tea
Sometimes we don't need a complicated herbal formula.
Sometimes we just need ginger, lemon, honey, and hot water.
This is one of my favorite combinations when I’m feeling cold, congested, nauseated, or generally blah.
Simple Ginger & Lemon Tea
Ingredients:
1–2 inches fresh ginger, sliced
2 cups water
Juice of ½ lemon
1 tablespoon honey
Directions:
Add the ginger and water to a saucepan and simmer for 10–15 minutes.
Strain into a mug and add the lemon and honey.
That's it.
No fancy equipment. No twenty-seven herbs that you have to order from an obscure website.
Just ginger, lemon, honey, and a little time.
Which is probably why this is one of the first things I reach for when my carefully planned herbal preparations have… failed to exist.
Peppermint Tea
Another simple remedy I like to keep in my cold-weather toolbox is peppermint.
A warm cup of peppermint tea can be incredibly refreshing when you’re feeling stuffy, and the aromatic experience can be comforting too.
Simple Peppermint Tea
Ingredients:
1 tablespoon dried peppermint leaves
1 cup boiling water
Honey, optional
Lemon, optional
Directions:
Place the peppermint in a mug and pour over the boiling water.
Cover and steep for 5–10 minutes.
Strain, then add honey or lemon if you like.
I love making a big pot of this and keeping it nearby throughout the day.
Just remember that peppermint and other strong aromatic herbs aren't appropriate for everyone, particularly very young children, so do your homework before serving herbal preparations to little ones.
A Few Words About Herbal Safety & Storage
Before I send you off to fill your kitchen with jars of herbs, honey, and vinegar, be sure to check out this page on safety and storage if you are new to herbal medicine.
The Herbal Apothecary Checklist
So, after getting caught completely unprepared this year, I’m making myself a little cold-and-flu-season checklist.
My goal is to have these things prepared before the next round of sniffles arrives:
Fire cider
Elderberry syrup
Dried elderberry flower for tea
My “Flu Bomb” tea blend
Sore throat tea ingredients
Homemade honey & thyme cough syrup
Plenty of ginger and lemons
Honey
Peppermint and other favorite dried herbs
A well-stocked tea cabinet
And, perhaps most importantly, plenty of tissues
Because no matter how beautiful your kitchen apothecary is, sometimes the best remedy is still a warm blanket, a bowl of soup, a good night's sleep, and letting your body rest.
I’m learning that herbalism isn’t about having a quick answer for every sniffle. For me, it’s about learning to work with plants thoughtfully, understanding what they can—and cannot—do, and having a few comforting preparations ready when my family needs them.
And this year, I am determined not to be caught empty-handed again.
Now, if you’ll excuse me, I have some jars to fill.
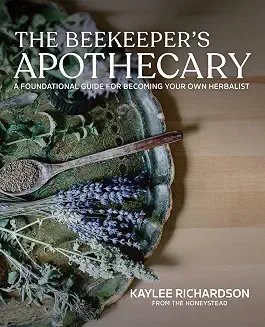
If you are looking into diving deeper into herbal medicine, these books have been my absolute favorite reference books lately. They take the guess work and frankly the fear out of experimenting with herbs and I have found them incredibly useful.
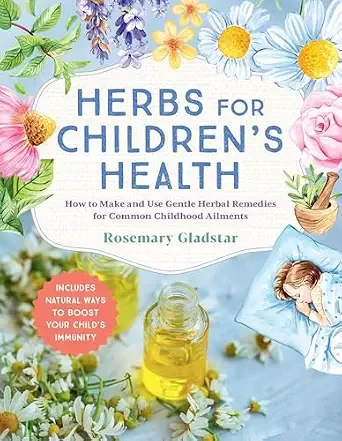
This book has been phenominal for finding simple herbal remidies that are gentle but potent.